11# Range Bar Scalping Strategy: High/Low
Submit By Joy22 2025
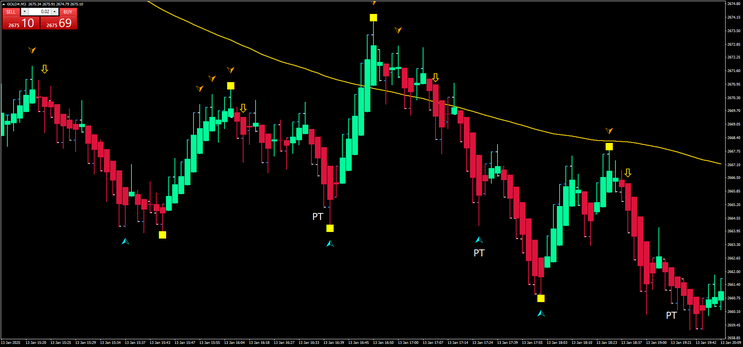
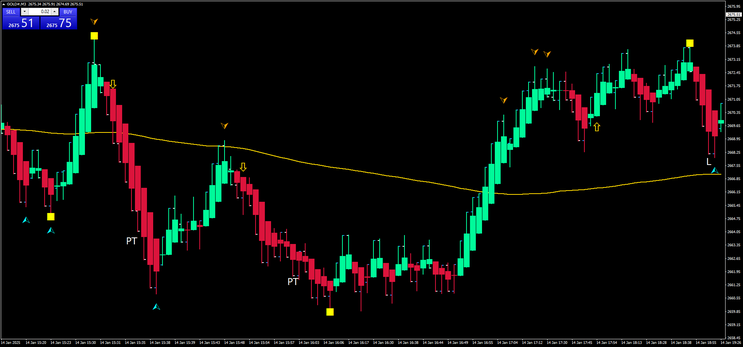
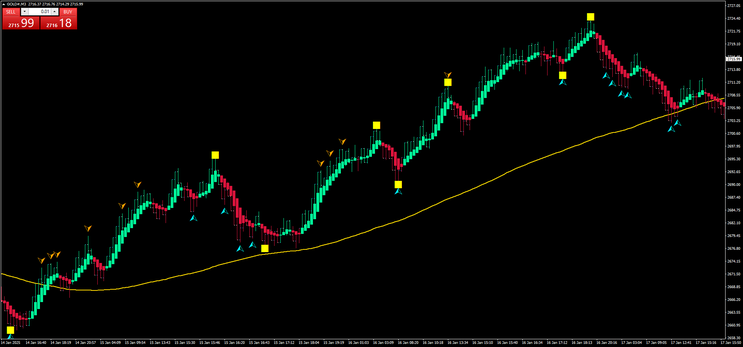
Range Bar Scalping Strategy: High/Low is a classic revisited with MT4 indicators.
Setup Strategy
Range Bar 8-13 pips depends on the pair.
Gold 100-200 box size 200 pips.
Volatile currency pairs: Gold, Nadasq, SP500, EURJPY, USDJPY, GBPUSD.
Only New York sessions
Metatrader 4 Indicators
Heikin Ashi Smoothef (1, 3)
3 ZZ traffic lights: (only the slowest Zizag is displayed with a yellow rectangle)
TMA CG No Repaint (20, 2.0).
Simple moving average 130 periods, close.
Trading Rules
Trend Definition
-
Only trade in the direction of the trend.
-
The SMA 130 defines the trend:
-
Uptrend: SMA is below the price candles.
-
Downtrend: SMA is above the price candles.
-
Buy Setup
-
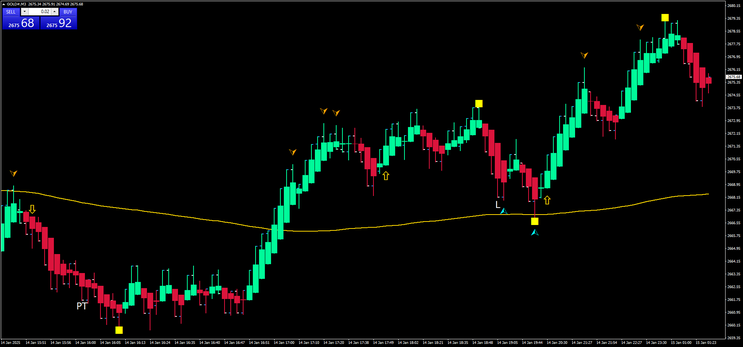
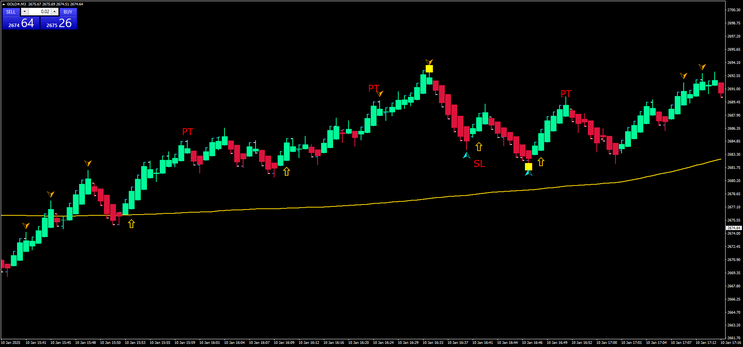
Price is above the SMA (indicating an uptrend).
-
Yellow Rectangle Formation: Wait for the yellow square to form below a candlestick.
-
Entry: Enter at the close of the second green Heikin Ashi candle.
Sell Setup
-
Price is below the SMA (indicating a downtrend).
-
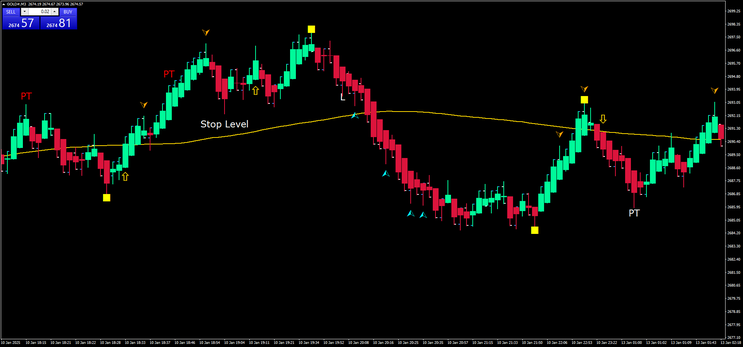
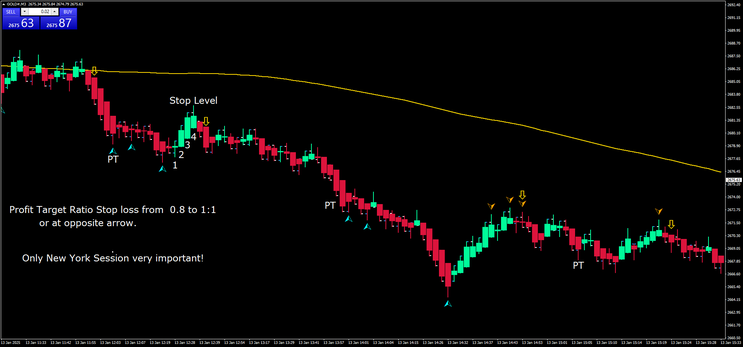
Yellow Rectangle Formation: Wait for the yellow square to form above a candlestick.
-
Entry: Enter at the close of the second red Heikin Ashi candle.
Re-enter in trend: wait for the retracement of three candles.
Exit Rules
- Stop Loss:
-
-
Place the stop loss just above/below the previous swing high/low.
-
-
Profit Target:
-
Use a risk-reward ratio of 0.8:1 to 1:1 relative to the stop loss.
-
Alternatively:
-
For buy trades, target sell arrow of TMA.
-
For sell trades, target buy arrow of TMA.
-
-
Notes
-
The strategy can also be implemented without the TMA indicator; in this case, TMA signals serve as additional alerts to refine the strategy.
-
Consistently follow the rules for entries, exits, and risk management to ensure optimal performance.
-
This strategy needs impulse volatility analysis, then I will update.
- Range Bars are installed as Renko charts.
Update 17/01/2025
Update setup Heikin Ashi sart calc=1 smooth Ma=4
Renko Scalping with vsa Trading System
Renko with Volume Spread Analysis
Submit by Joy22 (Written by Canuckct) 31/12/2011
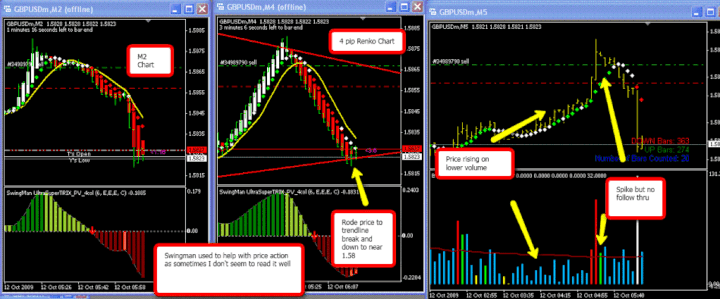
I time my entry using M2 and a 4 pip renko. Those two charts must be in agreement....after price crosses the 10sma, the open of the next bar is where I enter when I believe that the price is starting to move.
The swingman indicator is there as a visual only as sometimes I have a hard time
reading immediate price action and I have a bias for movement. This helps me get rid of that.
Once I'm in a trade, I like to ride the 10sma on the renko chart....when it crosses back I'm out.
Here is a trade I just closed....and is typical of the trades I'm looking for...although M5 doesn't always seems to be as abvious as this trade.
Share your opinion, can help everyone to understand the forex strategy.
Renko Forex Strategies
Renko chart Forex strategies - Forex Strategies - Forex Resources
11# Renko Scalping with vsa - Forex Strategies - Forex Resources
3# Goldflight's Renko strategy - Forex Strategies - Forex Resources
Installation on MT4 Renko Chart - Forex Strategies - Forex ...
13# Renko PK Scalping - Forex Strategies - Forex Resources ...
8# BMANS Renko System - Forex Strategies - Forex Resources ...
6# Renko Trend with Slope - Forex Strategies - Forex Resources ...
4# Kumo with Renko Chart - Forex Strategies - Forex Resources ...
7# 123 with Renko Chart - Forex Strategies - Forex Resources ...
5# Renko with Keltner Channel ATR - Forex Strategies - Forex ...
2# Renko with I-Regression bands - Forex Strategies - Forex ...
201# Renko Adaptive, Double CCI and 3BP - Forex Strategies ...
10# Ratis System with Renko Chart - Forex Strategies - Forex ...
12# Renko with DTOSC and Past Regression Deviated - Forex ...
Range Bars - Forex Strategies - Forex Resources - Forex Trading ...


